
One of the things I love doing in the holidays is being making things - whether it's baking cookies and cupcakes, decorating gingerbread houses or making cards (usually with offensive little poems inside...my friends are so lucky to have me in their lives).
However I can be a bit fingers-and-thumbs when it comes to crafting as I'm very clumsy and don't have a lot of patience.
Lauren from Fashion Looks North has created a wonderful Christmas bunting craft especially for this blog which looks so simple, yet effective - and is a brilliant way to rid yourself of all that leftover wrapping paper!
Also, I had to give space here for a fellow Northerner!
Lauren's blog was mostly street style for a few years, but she now has more of her own personal (and awesome) looks, lifestyle posts as well as beautiful photography.
So, happy crafting - if any of you make the bunting for yourself, me and Lauren would love to see your pictures!
Muchos love,
MessyCarla.
Well hello there, it's Lauren from Fashion Looks North
While the lovely Carla is away I thought I'd get into the Christmas spirit and share with you a really quick and simple crafty DIY, great for sprucing up your room on a budget.
I absolutely love making things look festive, from wrapping presents to decorating the tree and this is a great little 'infront of the telly' activity that takes minimal effort but looks really cute.
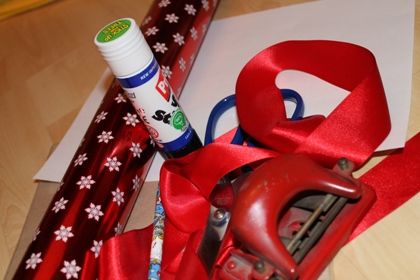
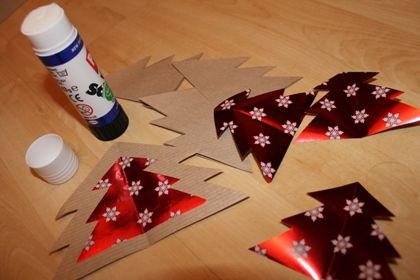
First of all, you'll need to get your mits on some ribbon, wrapping paper, brown paper, some scissors, a glue stick, a pencil and a hole punch.
You can use left over scraps from present wrapping if you like!
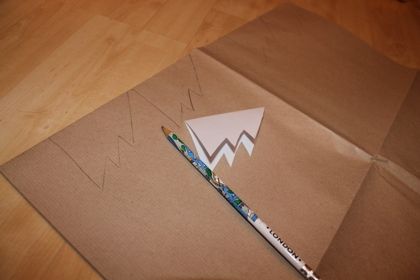
Start by making your templates. Fold over a sheet of paper and draw a small christmas tree outline on one side with your pencil.
Cut this out and then use as a rough template to draw another larger tree which will form the design for your bunting.

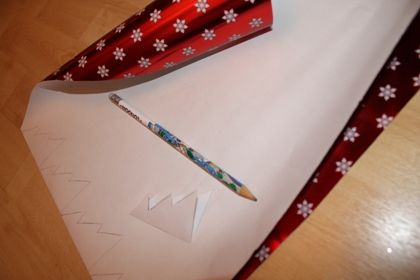
You then need to repeat the process and use your templates to cut out small and large trees using your two papers. You can make as few or as many of these as you like, I've just done four this time just to demonstrate.
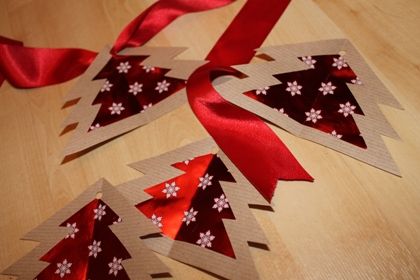
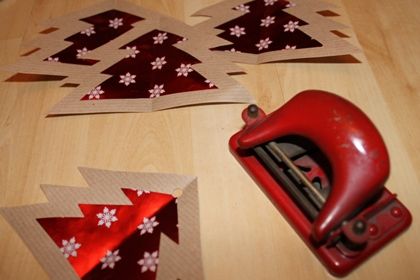
These can then be stuck on top of each other, ready to be hole punched and threaded onto your ribbon.
These can then be stuck on top of each other, ready to be hole punched and threaded onto your ribbon.
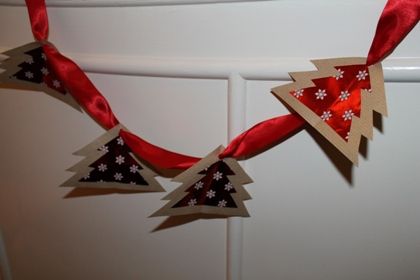
Once you've threaded them on simply hang up and display!
They look really lovely around doorways, mantlepieces or even picture frames and can be made from any materials you happen to have lying around.
They look really lovely around doorways, mantlepieces or even picture frames and can be made from any materials you happen to have lying around.
Merry christmas and happy crafting!
L x
Ahhh this is so lovely and festive! I might have to make my mum some as a surprise to pop on the tree :) xxx
ReplyDeleteThis looks gorgeous! I love a good DIY :) x
ReplyDeleteWhat a cool and pretty decorating idea!! It's so festive!
ReplyDeletewhat a lovely idea! nice way to use up scraps of paper too x
ReplyDeletetotally cute DIY!!!
ReplyDeletexoxo,
lindsey |
http://bowsandarrowblog.blogspot.com